
FREQUENTLY ASKED QUESTIONS (FAQs)
Q1: How do I select a set of photos for my package (digital files or prints)?
- Before a Favorites list can be created, Imagery.co.nz will require you to first log in or create an account. The Favorites List is then stored in your account. You will then be able to access the Favorites List from any internet connected computer web browser just by logging in to your account.
- To create a Favorites list or add photos to a Favorites list, navigate to the gallery that contains the desired images in Imagery.co.nz. (You will usually be given a direct link for this.)
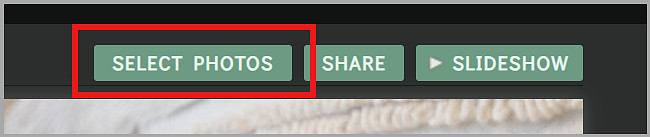
- Click on the Select Photos button.

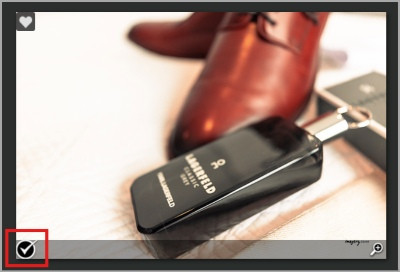
- Move your mouse over the bottom-left corner of a photo thumbnail and click on the black circle that appears. A check mark will be added.
Repeat this action with each favorite photo thumbnail until you have selected all desired photos.
- Or click All if you wish to select all the photos in the gallery.
- Click the Add to Favorites button.

-
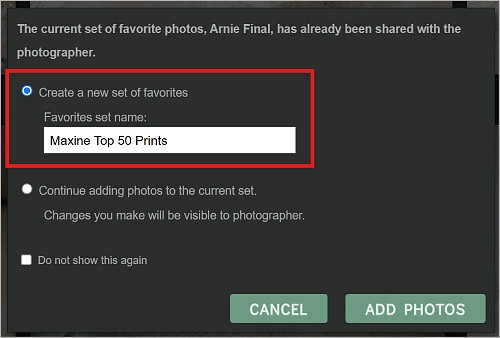
If a Favorite list has already been created, the option will be provided to continue to add to that set, or make a new set.
-
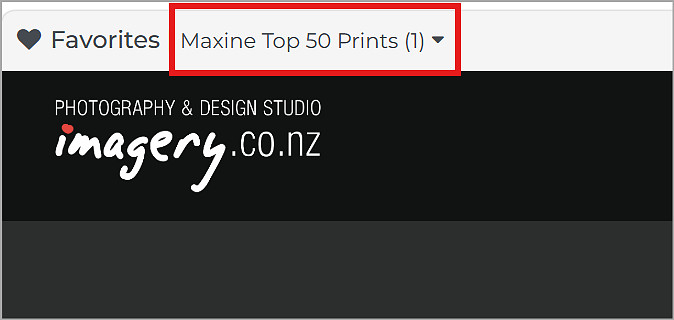
A Favorites list will be created based on your choices and a link to the Favorites list will be visible at the top left hand corner of the screen.
-
Once a Favorites list is created, the list is automatically accessible to the photographer. However the option is provided to Share the list with your photographer. Sharing a Favorites List allows you to communicate a message to the photographer about the photos in the list.
-
To share a Favorites list with your photographer:
-
Click on the name of your set in the top left corner of the site. This will open the Favorites list.
-
Click the Share Favorites button at the top right hand corner of the screen. A pop-up window will appear.
-
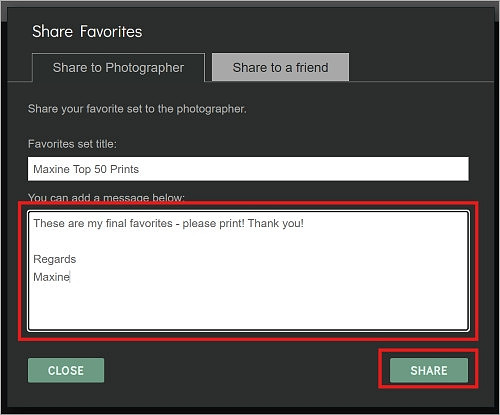
In the Share to Photographer tab, edit the title of the Favorites List.
-
Enter a message to the photographer in the field provided.
-
Click Share.
-
-
Imagery.co.nz will then send you your final selected photos in high resolution by email (using WeTransfer.com) or prints.
Q2: How do I upload high-resolution photos on Facebook?
Short Answer:
By default account settings, Facebook uploads your photo in standard low-resolution format.
To change this, you'll need to do the following steps before you can upload your photos in high-resolution.
iPhone:
-
Tap
at the bottom of the screen.
-
Scroll down and tap Settings & Privacy, then tap Settings.
-
Scroll down to Media and Contacts, then tap Videos and Photos.
-
Under Photo Settings, tap next to Upload HD.
Android:
-
Tap
.
-
Scroll down and tap Settings.
-
Scroll down and tap Media and Contacts.
-
Tap Photo Quality (High).
Long Answer:
There are two reasons for this:
Reason 1.
To assist fast webpage loading times for its users, Facebook compresses all images uploaded to it.
Reason 2.
As of January 2021, 81% of Facebook users only use a mobile phone to access their accounts (source: statista.com).
Because of this, these users will not see a huge difference between a low-resolution and a high-resolution Imagery.co.nz photo unless it is viewed on a desktop computer or laptop with a good monitor/screen.